Private WebPageTest instances on AWS
16 July 2015
In last years performance calendar Pat Meenan shared how to setup your own private WebPageTest instance in 5 minutes. I haven't had the time to try it out until now. I want to have my own instances that I drive using sitespeed.io and graph the result using Grafana.
It is really straight forward but since I'm not 100% friend with the Amazon web interface, I wanted to share exactly how I do to set it up (so I remember it myself the next time I will do it).
Setup
What is really cool with the AWS setup is that you only need to install the first AMI that is the WebPageTest server. The server will create the agents needed, you don't need to do anything. Do it like this:
- Login or create an AWS account and create a new user.
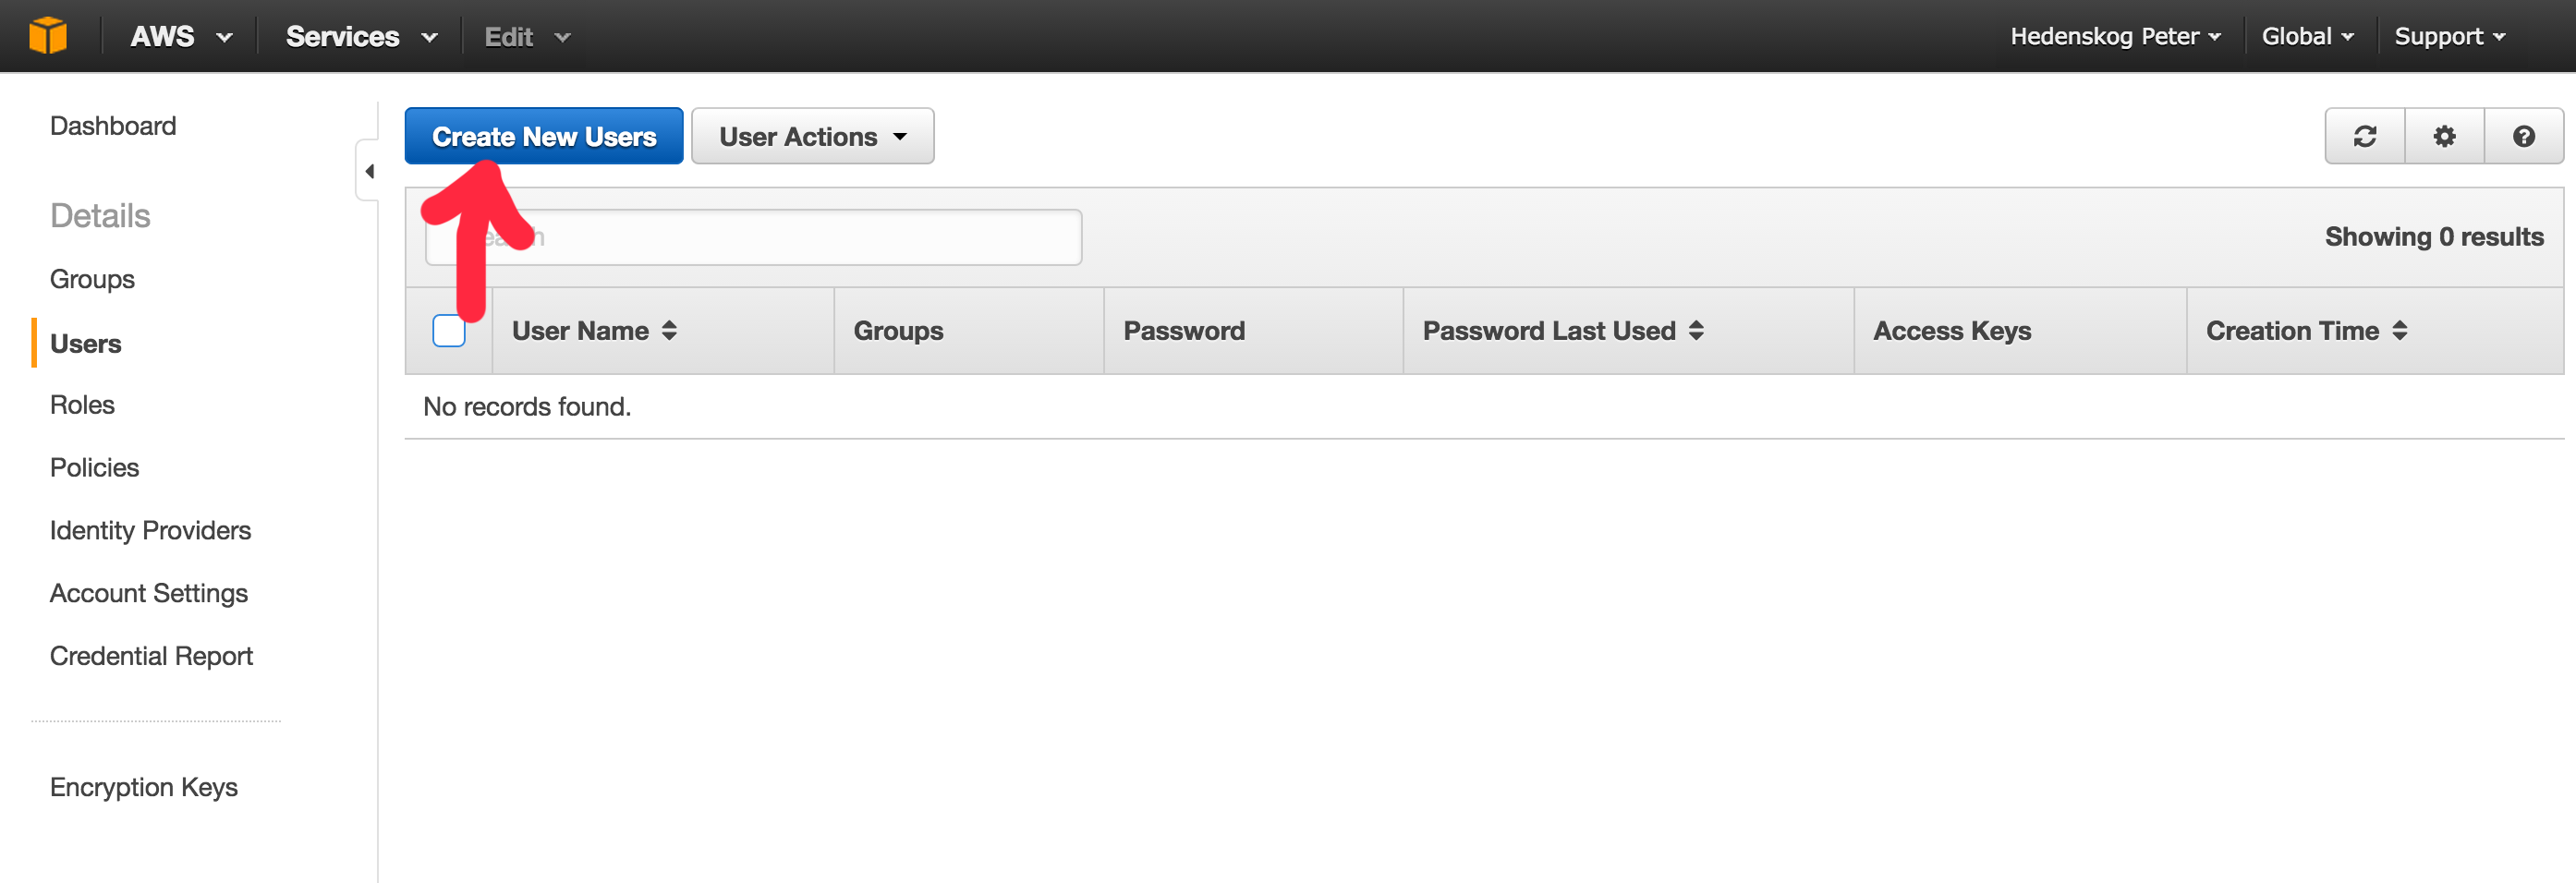
-
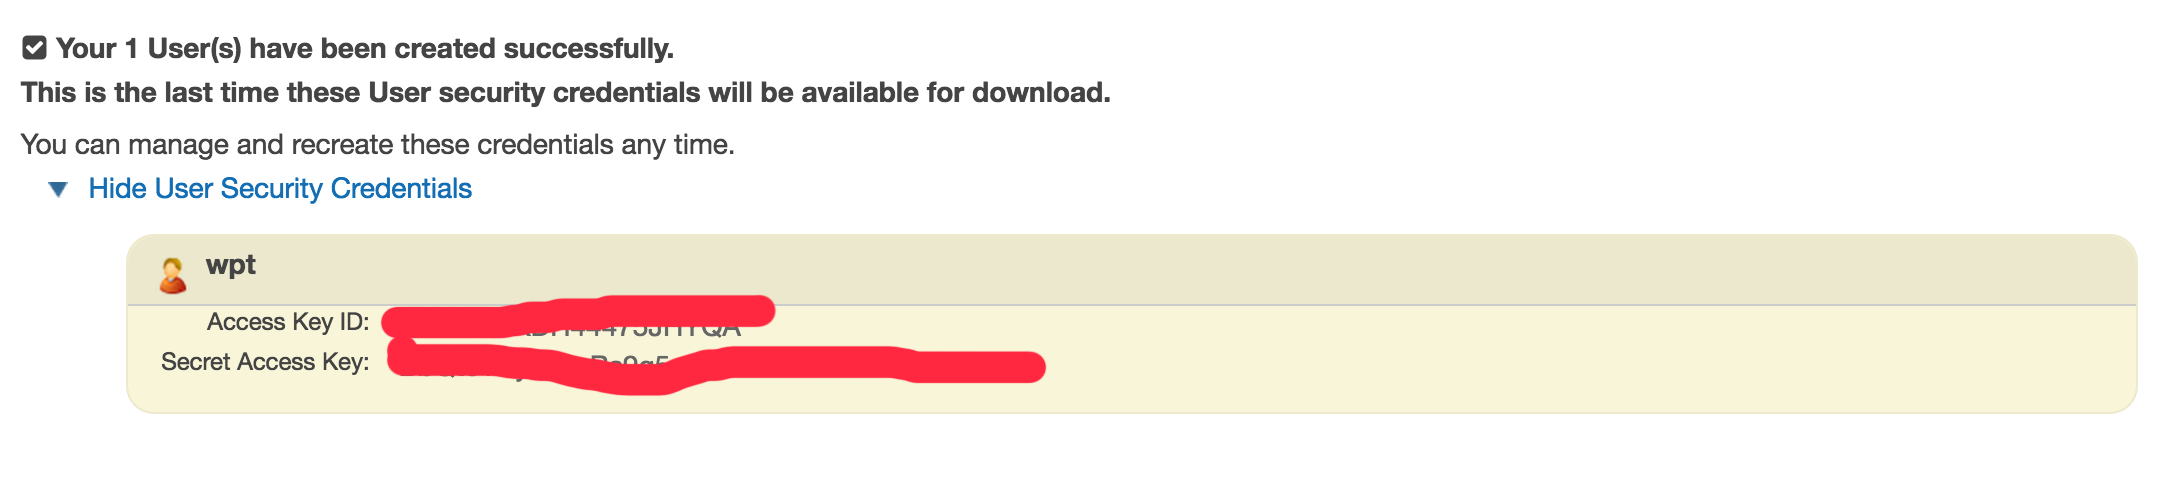
The new user will have the access key and the secret key that you need when you configure WebPageTest (so WebPageTest can create new agents). Store these id:s and add them to the configuration in a later step.
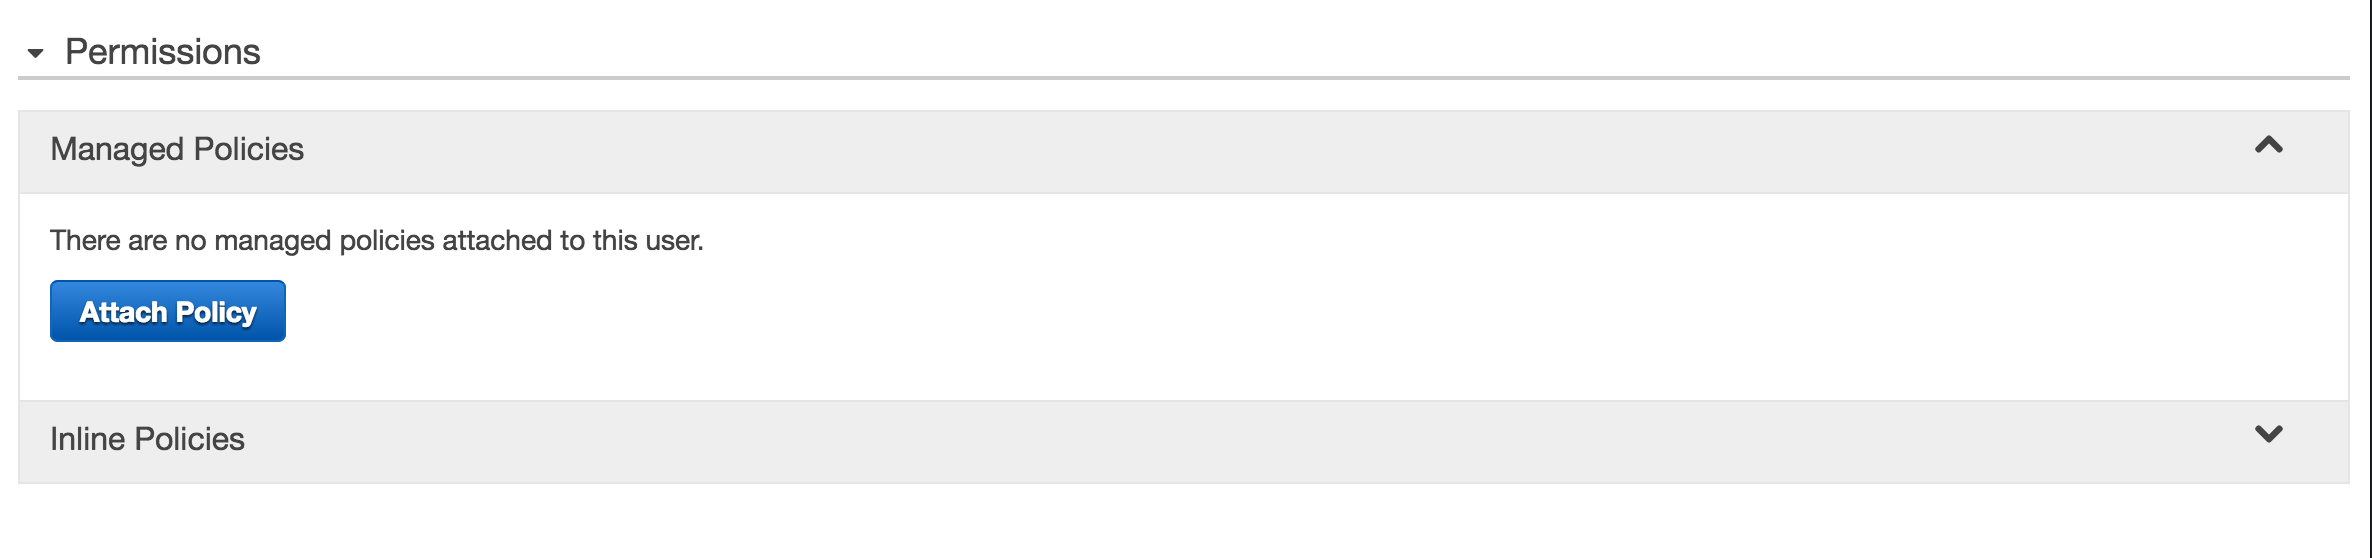
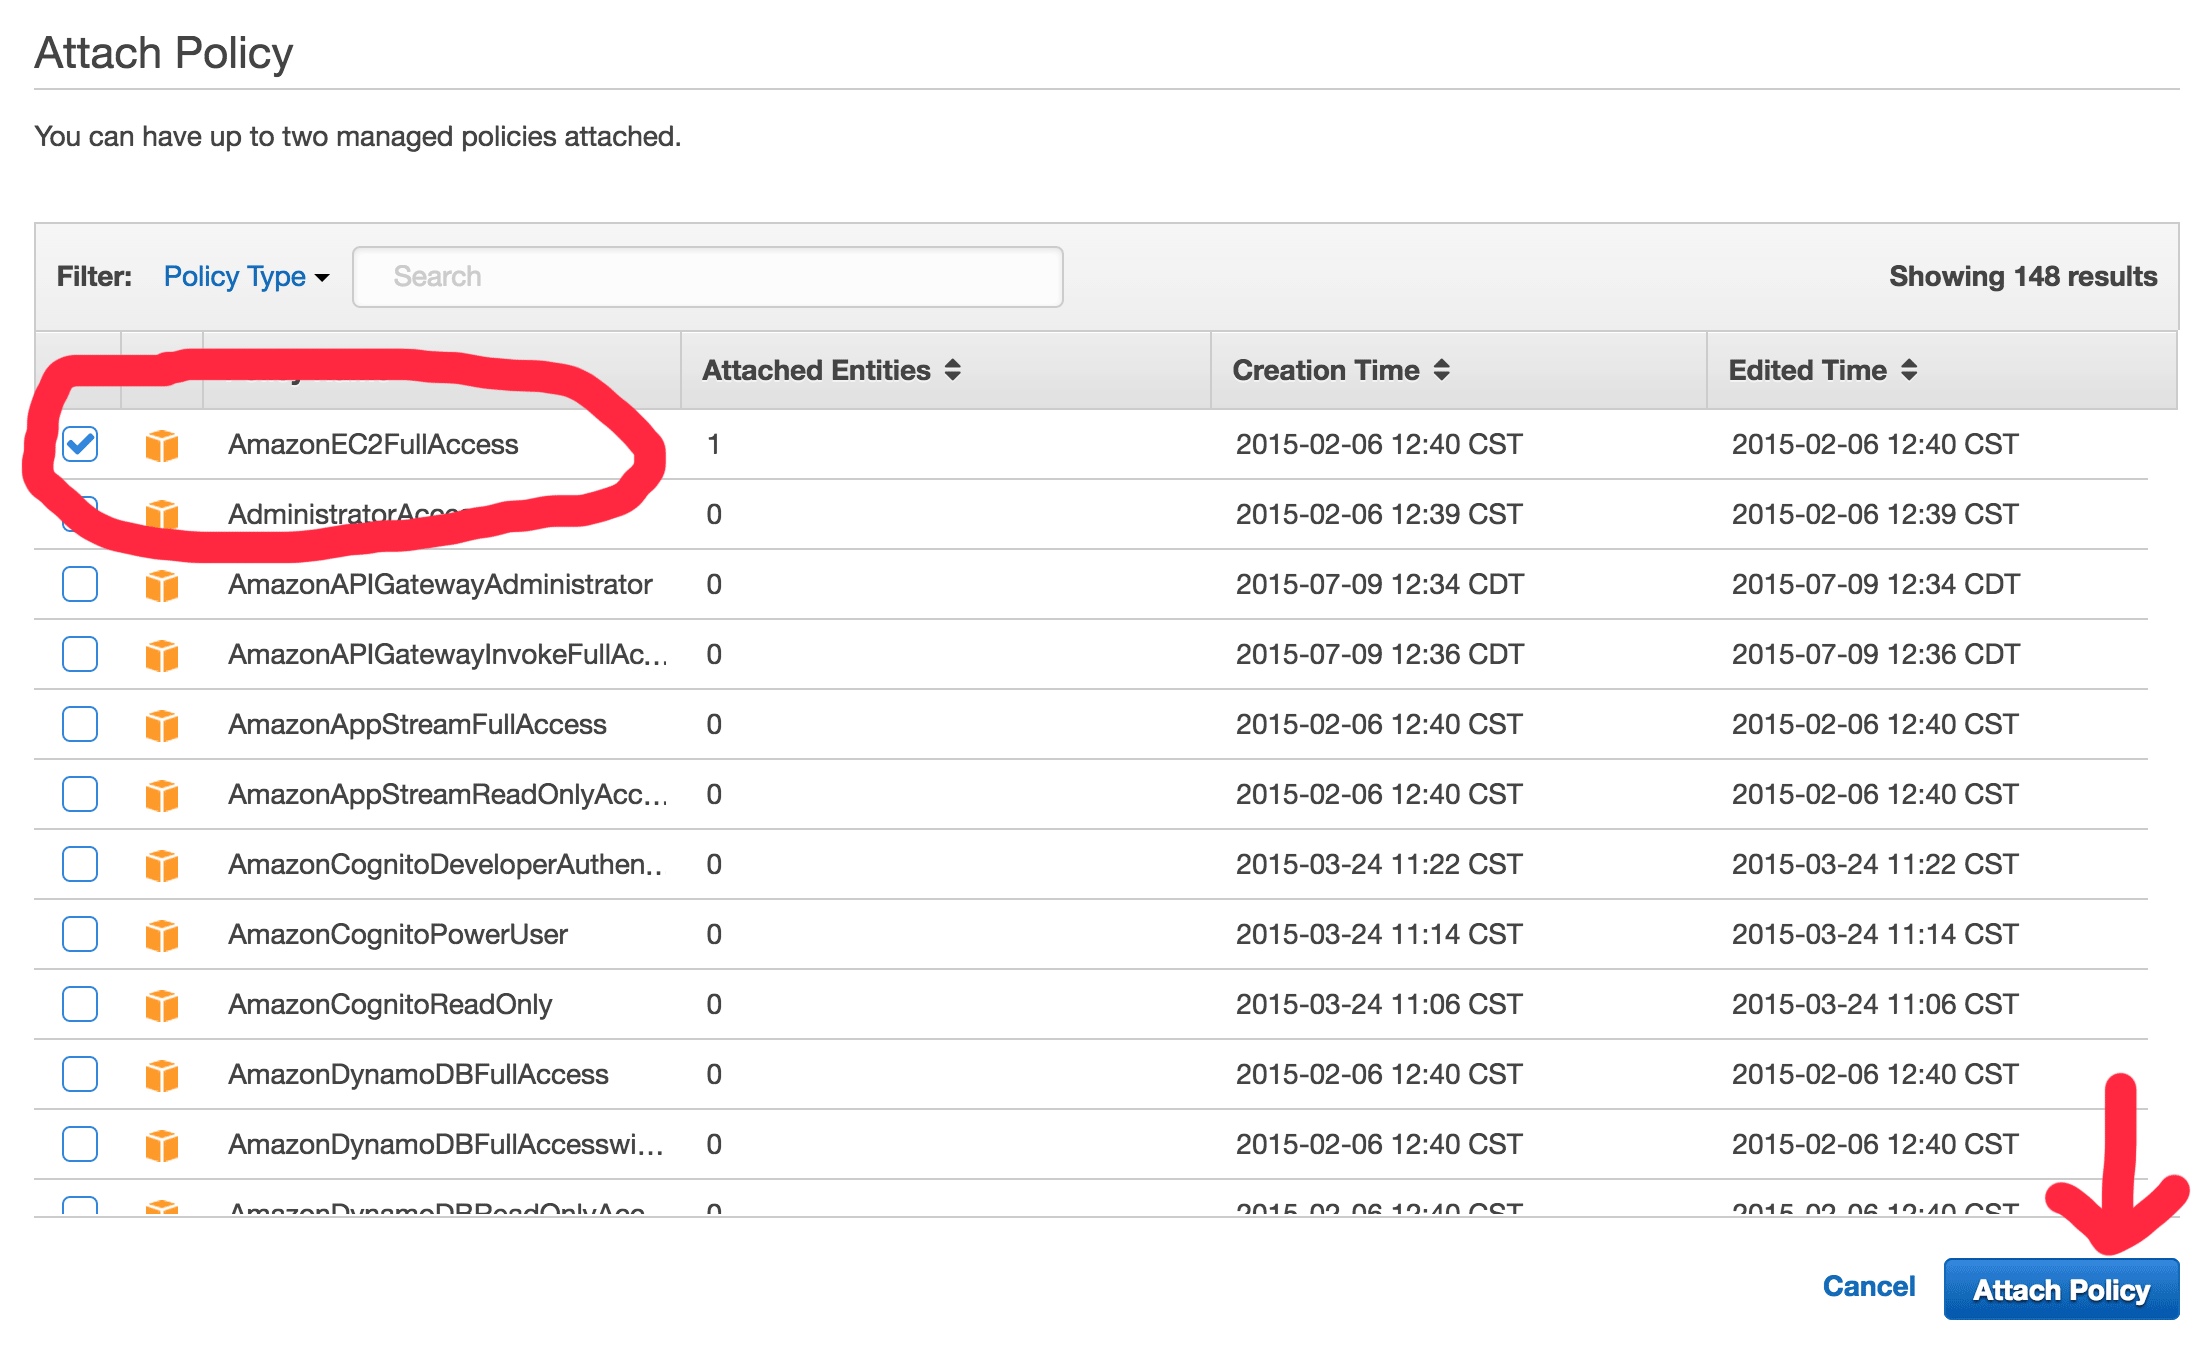
- Then you need to set a policy for the user so it can create and remove instances in Amazon EC2. Attach the AmazonEC2FullAccess policy for your user. This has been driving me crazy to get it to work with less permissions.
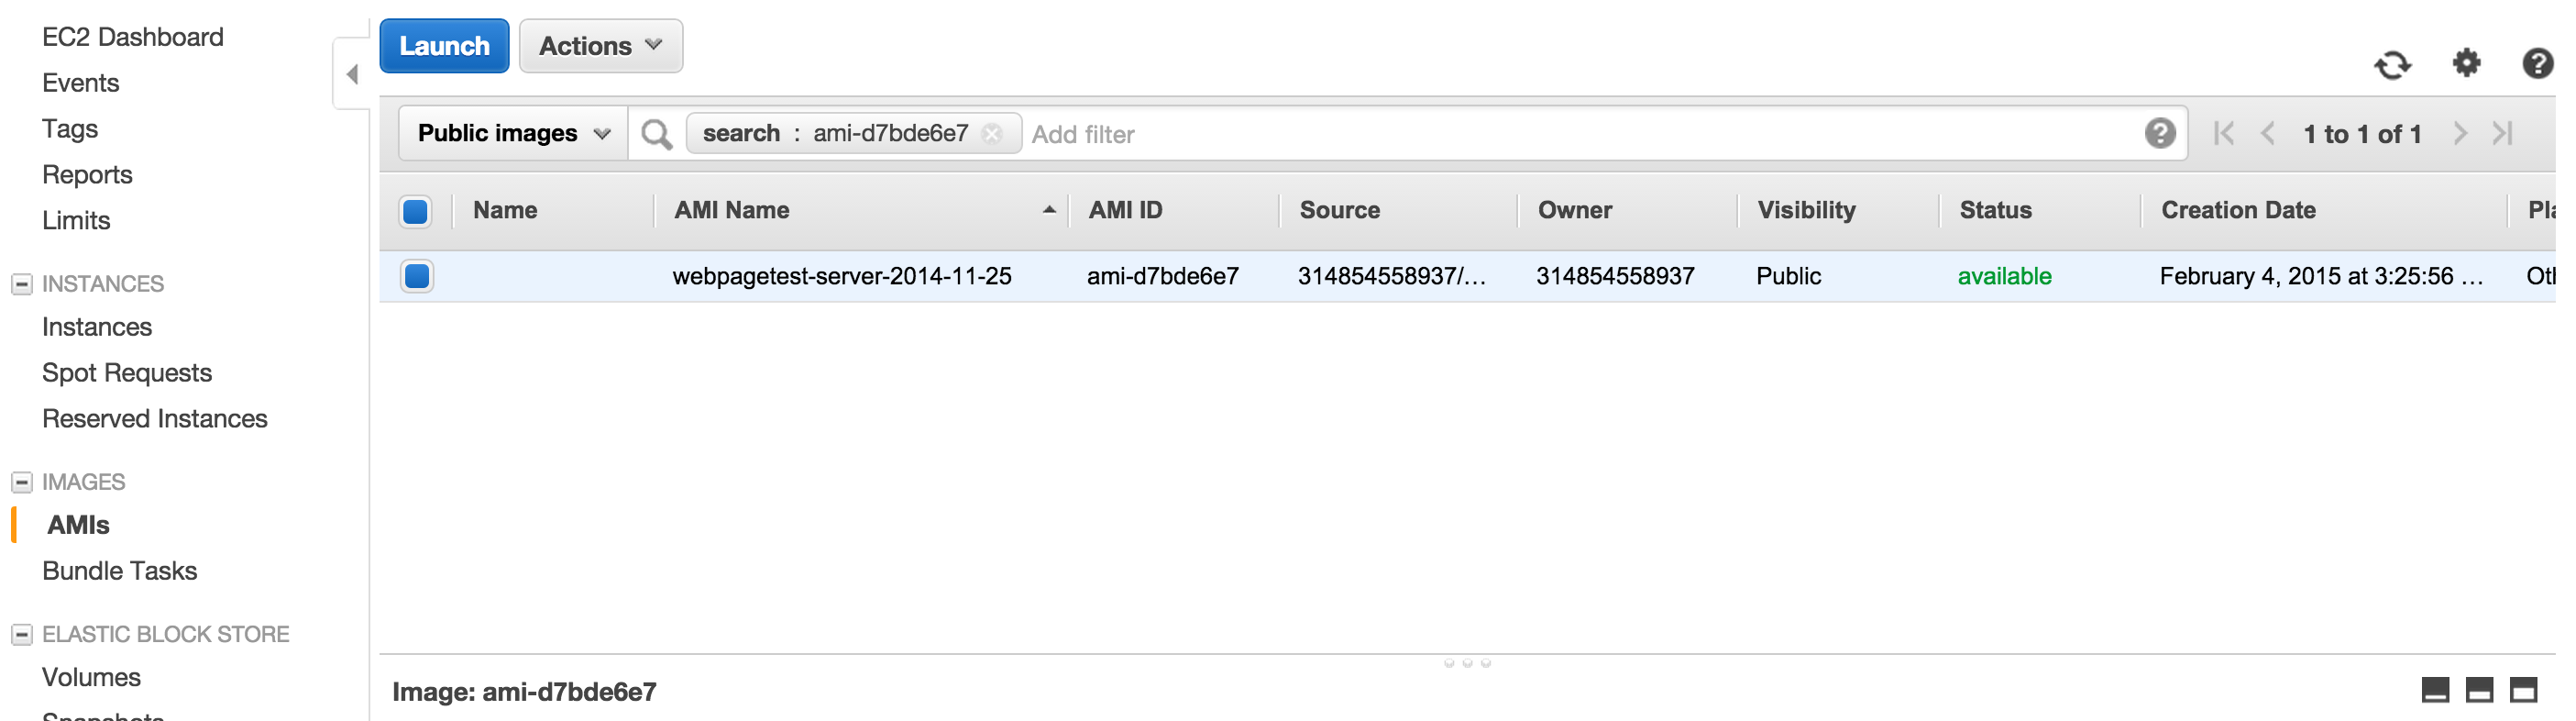
- Your user is now ready and then you can start setting up your instance. Find your AMI instance. You can find the latest WebPageTest AMI id:s here. I used ami-d7bde6e7 for us-west-2. Choose Actions and then Launch.
- You can use the smallest instance t2.micro (chosen by default) and move on using Next: Configure Instance Details.
Add the configuration for the server (using Advanced details). You can override all configurations in the WPT settings if you want.
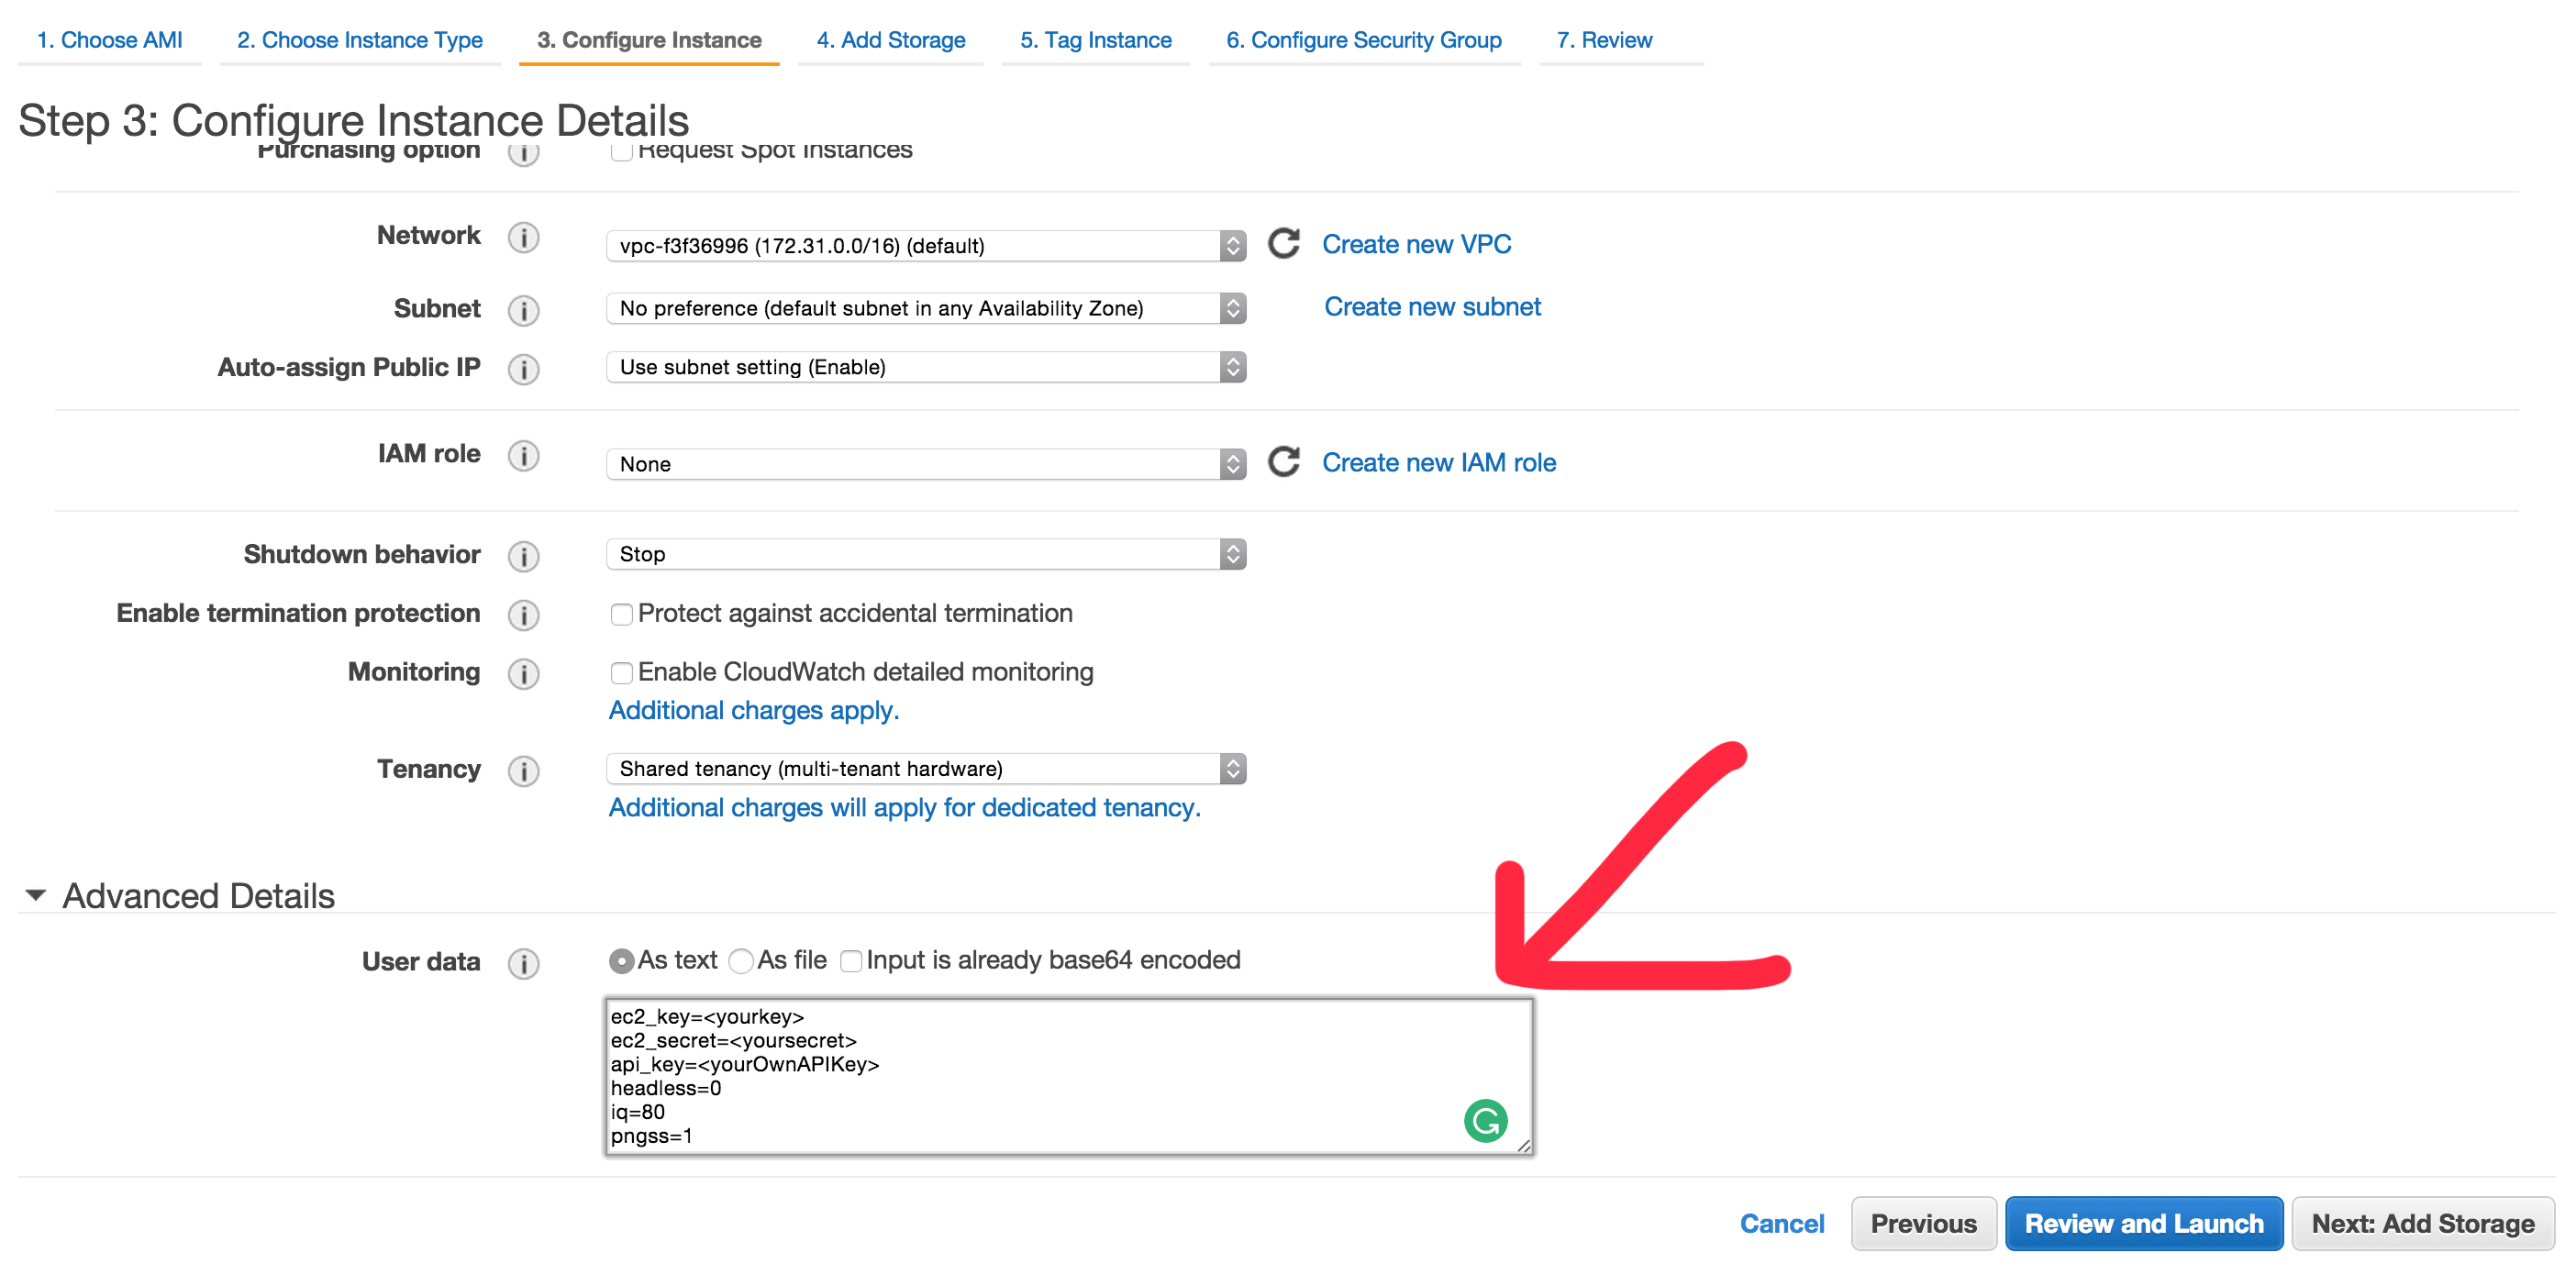
ec2_key=<yourkey>
ec2_secret=<yoursecret>
api_key=<yourOwnAPIKey>
headless=0
iq=80
pngss=1
By default the WPT is headless and that is perfectly fine if you use the API (using sitespeed.io) but it can also be good to actually check the result or manually be able to run tests. Then set the headless=0. iq and pngss make better quality images.
The api_key is the key you use as wptKey when you drive WPT through sitespeed.io.
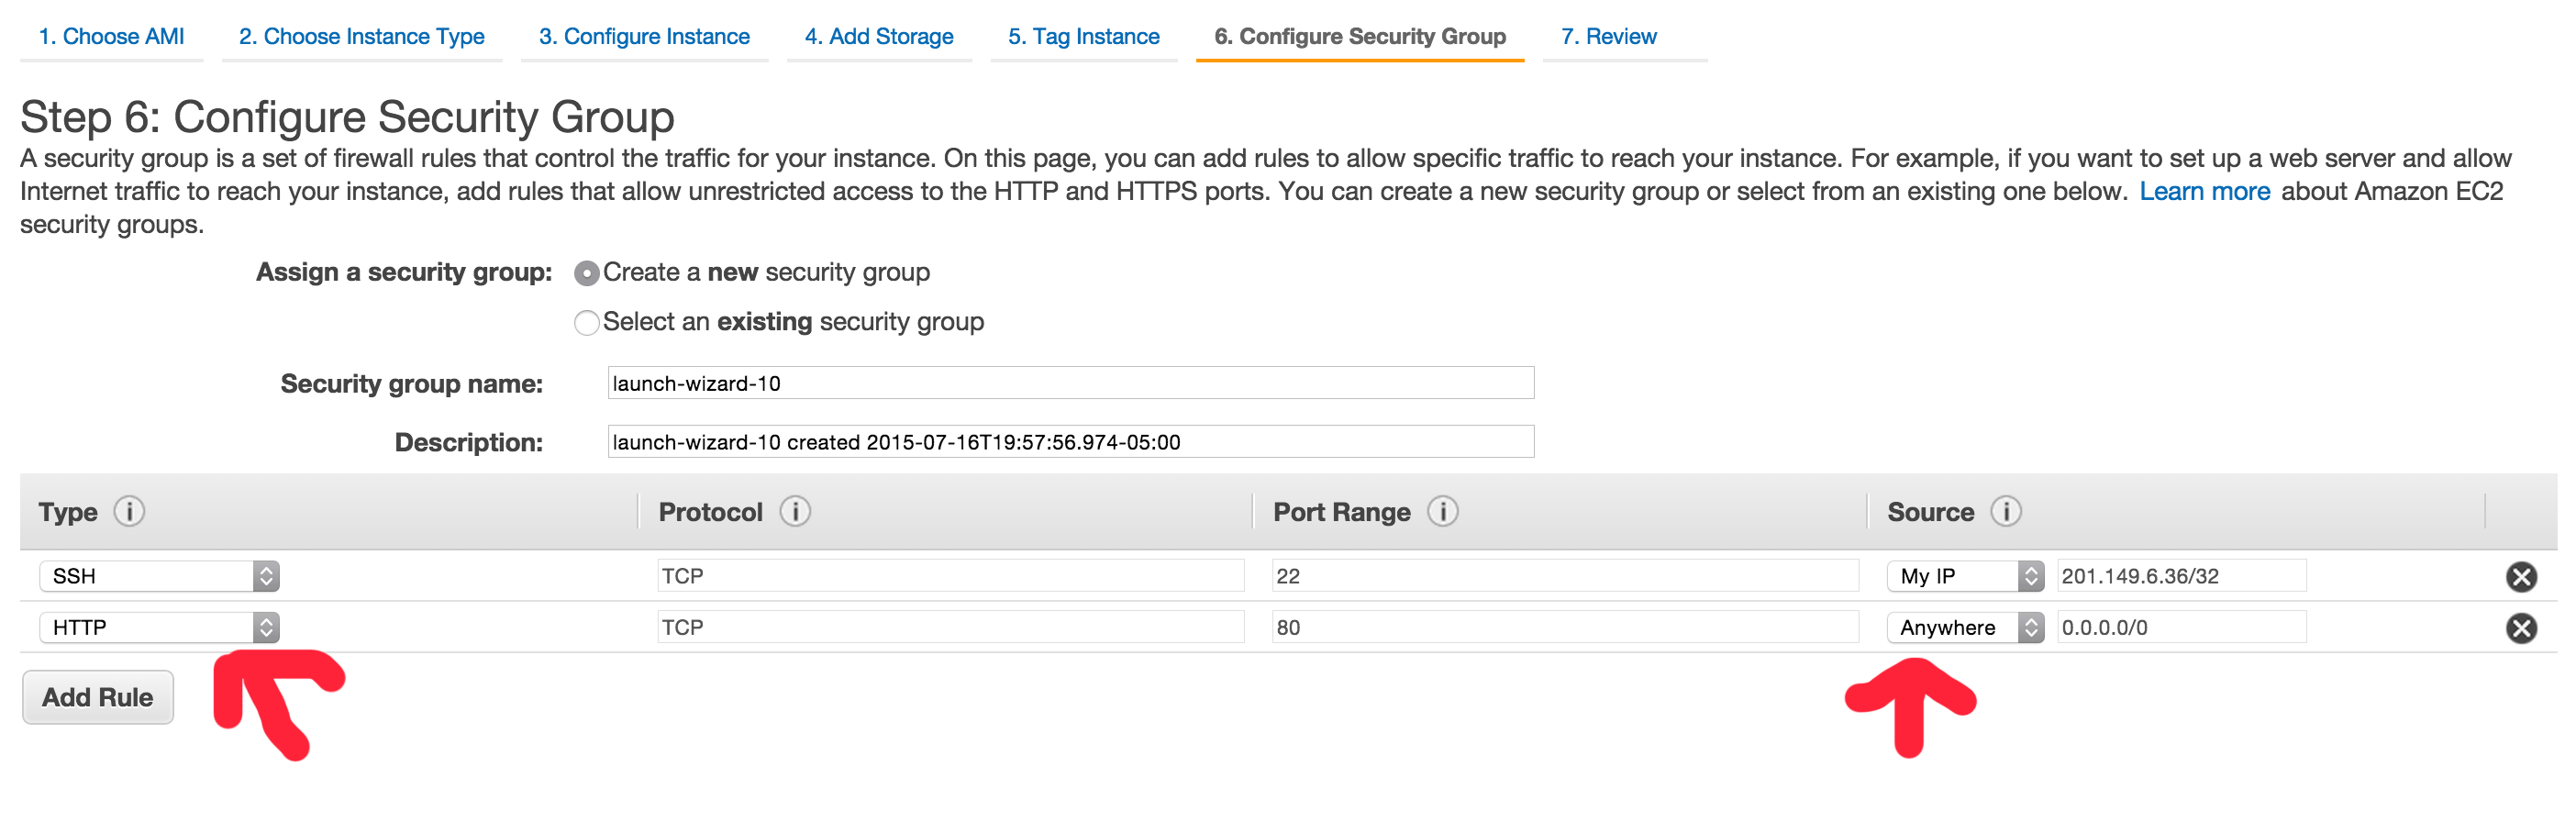
- Jump to the Configure security group and make sure everyone can access the instance using HTTP (default is only SSH).
- You have finished! Choose Launch and after a couple of minutes you should be able to access your instance by the IP.
If you want to store each run on S3 that's also doable.
And one last things: Sometimes it takes long time and then I mean really long time to start a new agent instance. If you can afford it it's good to keep one alive all the time and you do that by EC2.<ZONE>.min=1. If you want one always running for us-west-2, you add it like this to your configuration.
EC2.us-west-2.min=1
EC2.us-west-2.max=5
 Written by: Peter Hedenskog